When hosting friends or family, it’s wise to establish a separate guest WiFi network. Without this precaution, anyone connecting to your main network gains access to your personal data and devices. Despite your trust in guests with your WiFi password, inadvertent spread of malware or viruses remains a risk. To safeguard your privacy, learn how to create a guest network on your WiFi router.
Prior to establishing a guest network, accessing your WiFi router is necessary. To log in, familiarity with your router’s IP address is key. Discover how to locate it on either a Windows or Mac computer.
- How to find your router’s IP address on a Windows 10/11 PC: Simultaneously press the Windows + R keys on your keyboard. In the Run box, type “CMD” and press Enter. Within the command prompt window, input “ipconfig” and press enter. Locate your router’s IP address positioned next to Default Gateway.

- How to find your router’s IP address on a Mac: Click the Apple logo in the top-left corner of your screen and select System Settings. Then select Wi-Fi from the left sidebar and click the Details button next to your WiFi network. Finally, you will see your router’s IP address next to Router.
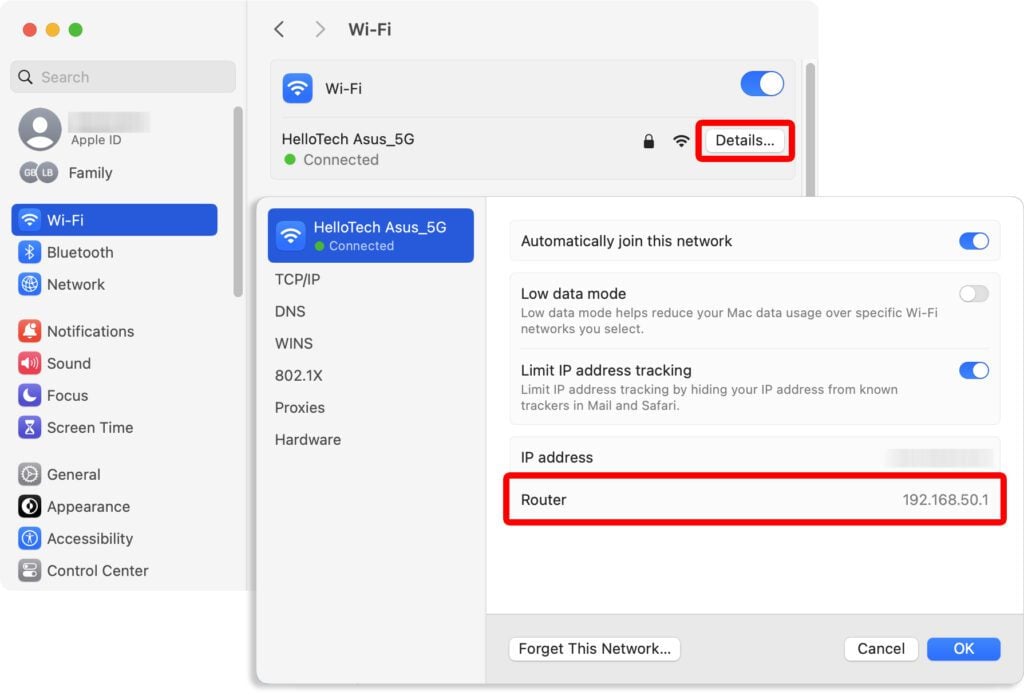
- For older Macs: To access your router’s IP address, start by clicking the Apple logo at the top-left corner of your screen. Choose System Preferences, then navigate to Network. Select Wi-Fi from the left sidebar and click on Advanced in the lower-right corner. Once there, open the TCP/IP tab, and you’ll find your router’s IP address listed next to ‘Router’.
How to Set Up a Guest Network
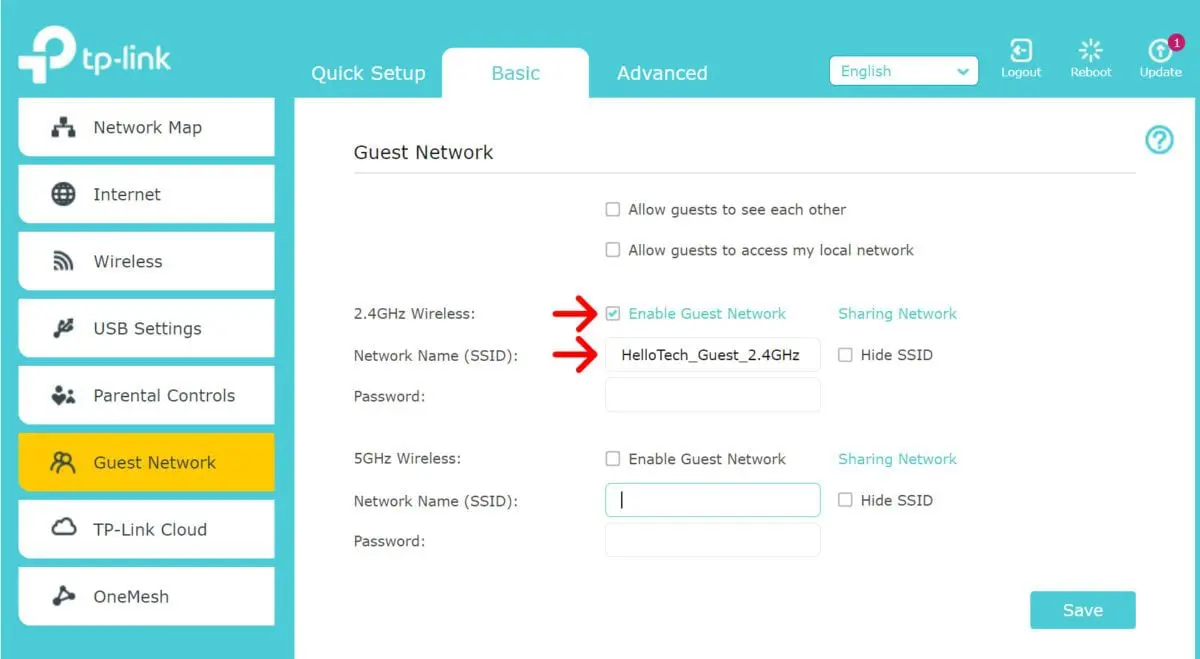
To create a guest network, open a web browser and type your WiFi router’s IP address in the address bar. Log in to your router to access the “Guest Network” settings. Next, select a WiFi band, enter a network name, choose a security protocol, and establish a password. Finally, click on Apply or Save to save the modifications.
- Open a web browser. You can use Chrome, Safari, Edge, or any other web browser you want. While it is easier to use a computer, you can also use a smartphone or tablet to set up a guest network.
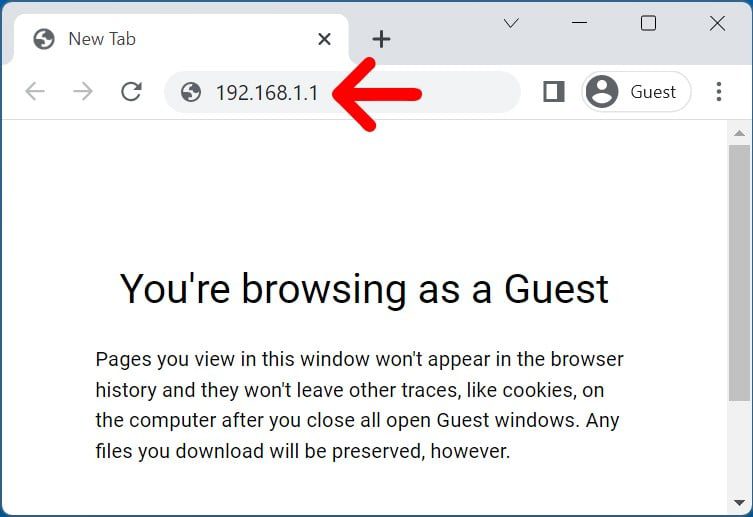
- Then, type your router’s IP address into the Address Bar. This is the same place where you would enter a website URL.
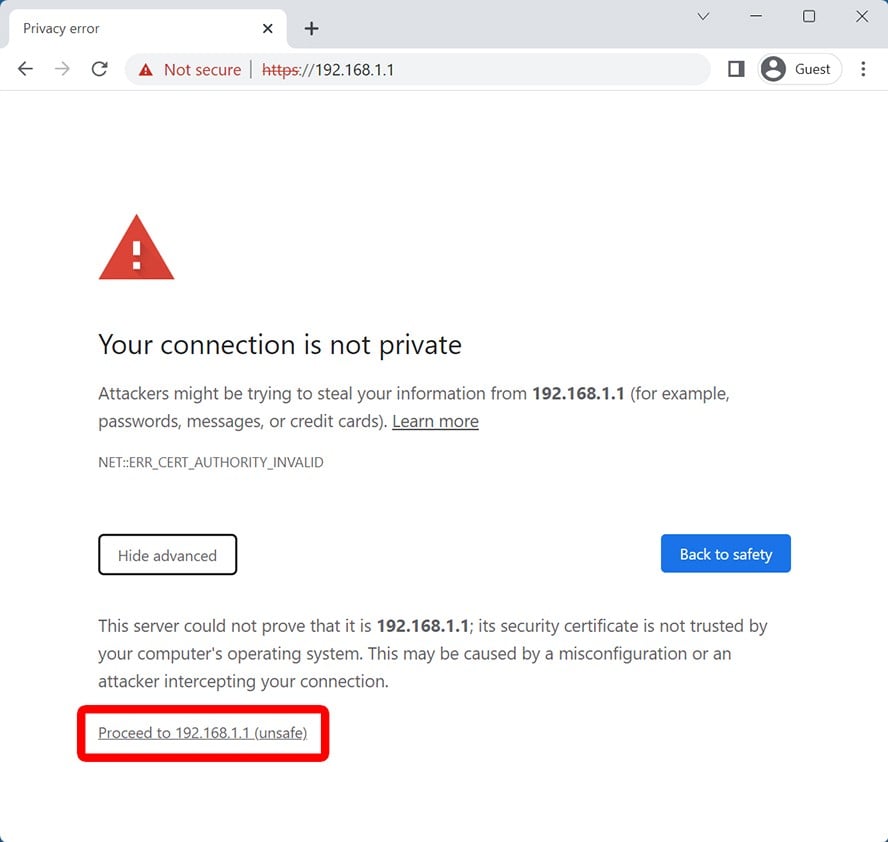
- Note: After entering your IP address, a warning about the webpage’s security may appear. Verify the correct IP, then proceed by clicking the designated option. If the option is not visible, select Advanced > Proceed.
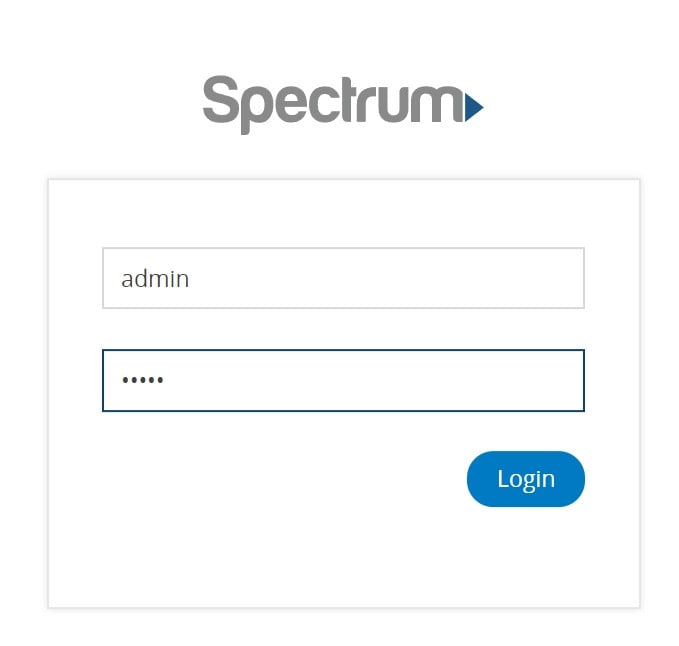
- Next, enter your router’s login info. In most cases, the default username will be “admin” or left blank, and the password will be “admin,” “password,” or left blank.
- Then, click Guest Network. If you can’t find a guest network button, check under “WiFi,” “Wireless Settings,” or “Advanced.”
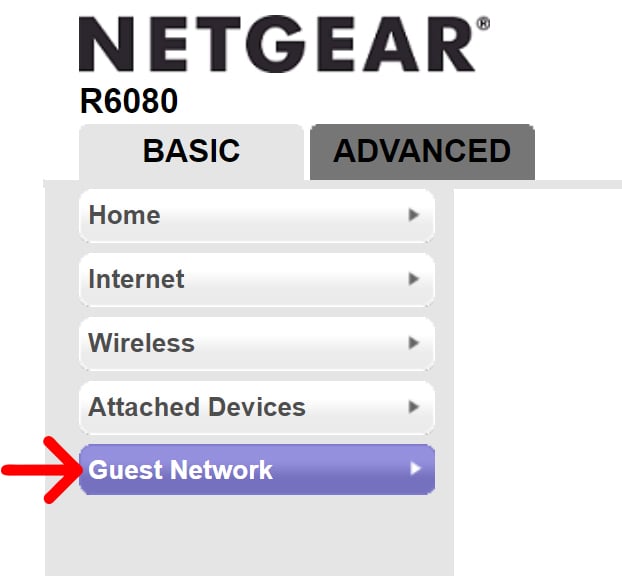
- Note: Certain routers may lack the option to set up guest WiFi networks. If you’re unable to locate the guest network button, consult your router’s online manual to determine if it supports the creation of guest networks.
- Next, select Enable Guest Network under 2.4GHz, 5GHz, or 6GHz. Your router may not display all these options. The 2.4GHz network, though slower, boasts the longest range. In contrast, the 5GHz and 6GHz networks offer higher speeds but cover shorter distances.
- Then, you can choose a network name. You might also see this under SSID (service set identifier).
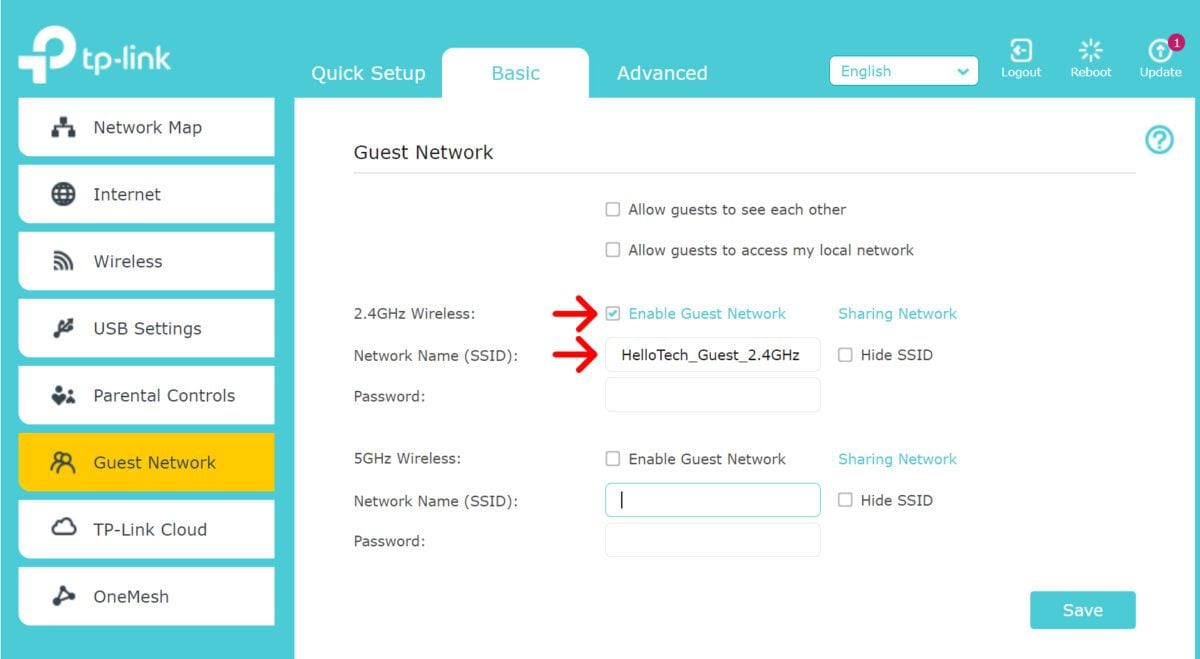
- Next, choose the guest network’s security settings. When setting up a guest WiFi network with “Open Access,” anyone can log in without a password. Usually, opt for WPA2 or WPA3 “Personal” for added security. If you’re unsure about the best router security option, refer to our guide for assistance.
- Then, you can change the guest WiFi password. Some routers will fill in your network name and password by default, but it is recommended that you change them manually.
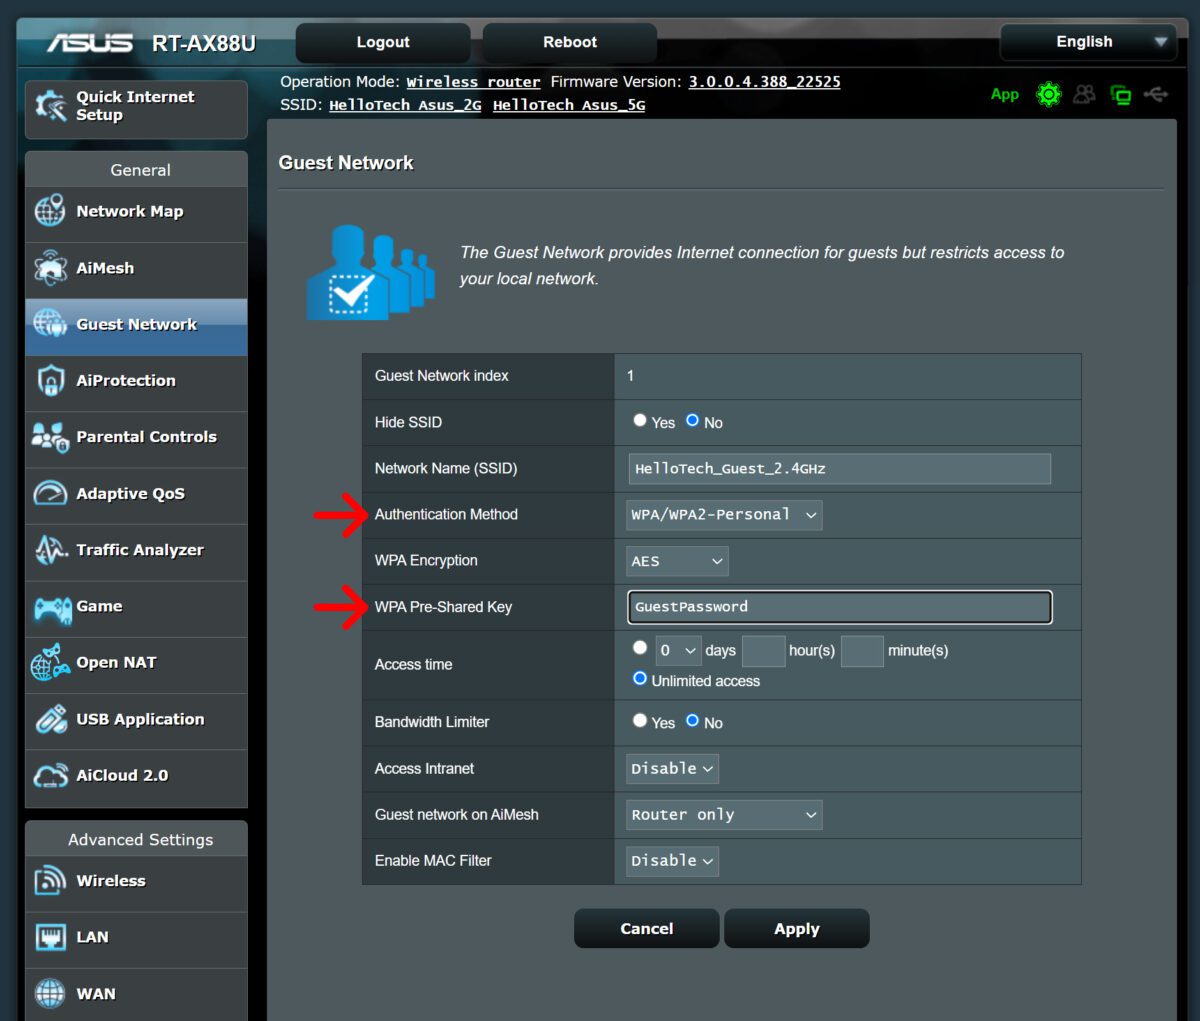
- Note: Avoid using identical passwords for your guest and main networks. Opt for a password that strikes a balance – easy for guests to recall yet tough for strangers to crack.
- Finally, click Save or Apply. You can now share the WiFi name and password with your guests.
thanks for visit my website
